As promised, this post will show you how to make the draw string bags that you can use to organise your life!
Step by Step……….this makes a bag measuring 20cm x 30cm but you can just scale up or down to make the size of bag you require:
What you will need:
- Patterned Fabric 1 – two rectangles each measuring 29 cm x 22 cm (which includes a hem allowance of 1.0 cm). Non-stretch fabric is best.
- Patterned Fabric 2 – two rectangles each measuring 8 cm x 22 cm (which includes a hem allowance of 1.0 cm). Non-stretch fabric is best.
- Scissors
- Sewing Machine (plus overlocker if you have one!)
- Co-ordinated Ribbon (90cm) or some excess fabric in either pattern to make your tie through the top of the bag
- Pins
- Cut Your Fabric
Measure your rectangles out marking the reverse side of the fabric according to the measurements above, I always use a water erasable pen for this but if you do not have this you could use a pencil. The benefit of the water erasable pen is that you can mark confidently and freely knowing that with a bit of water you will be able to just remove the marks. Measure the dimensions at several points on the fabric to get your rectangles and cut out. Also mark on your rectangles the seam allowance so that you have a rectangle marked within the rectangles you have cut (see below).
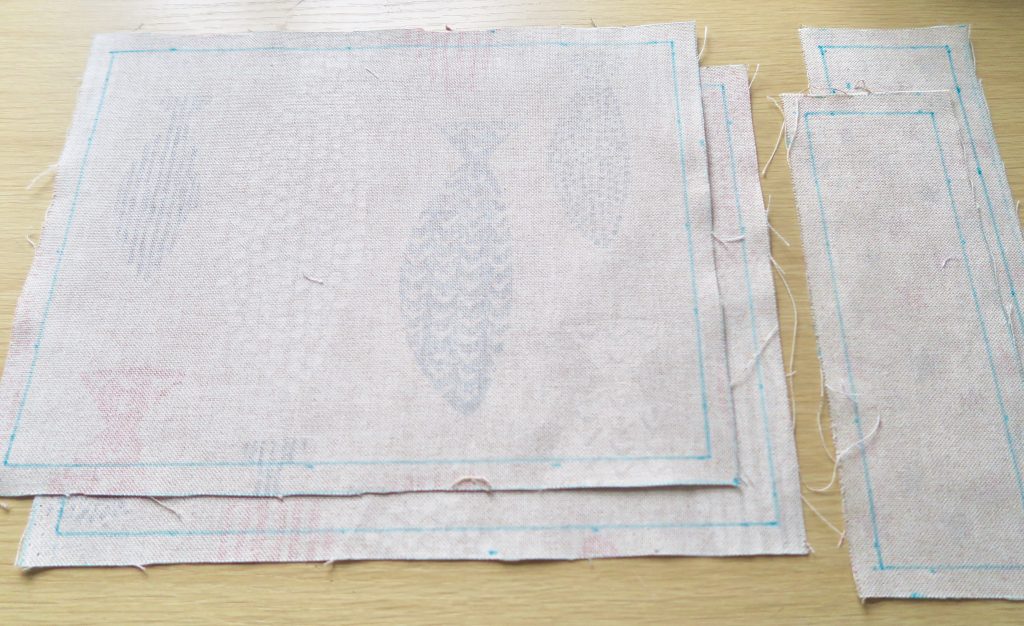
Tips: make sure your fabric is nice and flat – iron it before hand to remove any creases. Mark and cut out your fabric on a nice flat clear space.
2. Sew pieces together
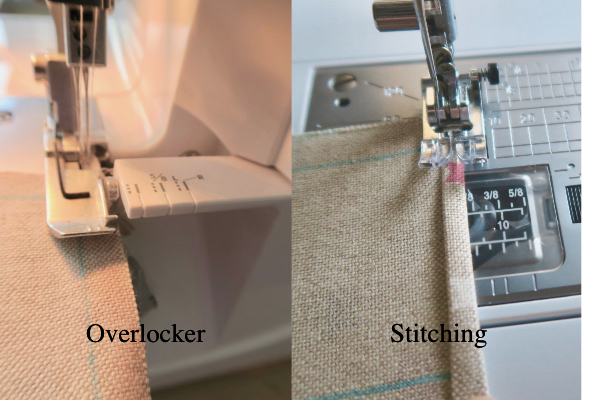
Take the two large rectangles of Fabric 1, place them with the right (patterned good sides) together and pin them to hold secure. Sew them together around 3 sides leaving one of the shortest openings un sewn.

I just use the overlocker straight onto this but if you are using a sewing machine, stitch around the fabric then finish your edge with a zig zag stitch and then trim. See below.
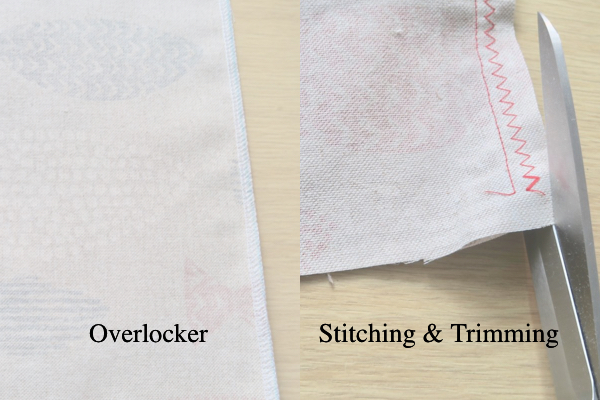
Press out the seams to give you a neat finish and turn your piece the right way. Iron again.
Tip: Pressing out seams when you have used an overlocker is not quite so straight forward but just press to one side (rather than out flat as you would if it was stitched traditionally).
3. Finish the short edges on the small rectangle pieces of your Pattern 2 fabric
These two small rectangles will become the top of the bag where the tie goes through. Take the rectangles and overlock the short edges and then stitch down. If you are using a sewing machine only, carefully fold the edges down and then down again to make a sealed end to each side – stitch with your machine. In both cases this is just to make a neat as this will be the opening for the tie thread.

Then fold each of your rectangles down the long centre with the right sides facing out and press. You should have two pieces that have one fold with the folded items measuring 20cm x 4cm.
4. Pin the top of the bag to the body
Ensure the bag is turned the right way and nicely pressed. Take the Fabric 2 rectangles and pin one each side to the top of the Fabric 1 piece as shown below. The raw edges should all be together and your rectangles applied to the outside of the bag.
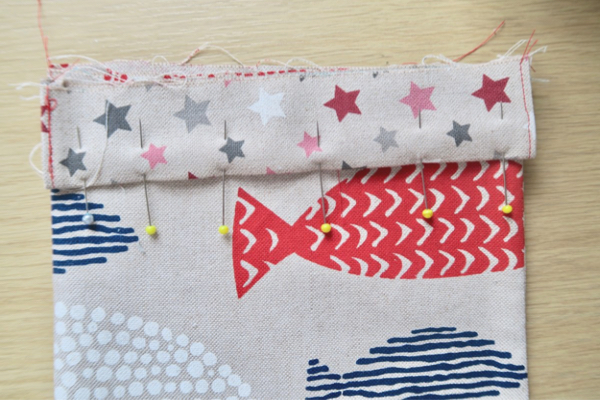
4. Stitch (or overlock) all the way around the mouth of the bag. If you are stitching, finish the edge with the zig zag stitch and trim.
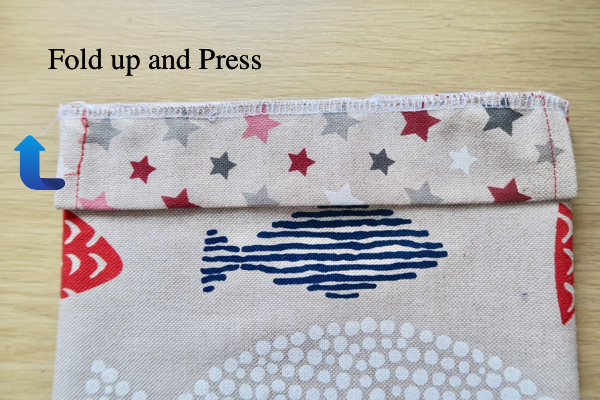
Once you have stitched around the top, fold back the tops of the bag (Fabric 2) and press flat.

5. Top Stitch
Top stitch around the mouth of the bag to neatly keep your edge flat and out of the way when you are using your bag.

6. Thread the ribbon/tie through the bag
Take your ribbon and thread this through both parts of the bag, I usually attach a safety pin to one end to make it easy tho thread through.
Once threaded, stitch the two loose ends together to make a neat edge. Then make a tie at both sides of the bag.

7. You’re Done!
Hooray! Your bag is ready to use!

